Moving is tough, but the right supplies can make it easier and protect your belongings. Here’s what you need:
- Moving Boxes: Standard sizes for different items, plus specialty boxes like wardrobe and TV boxes.
- Packing Tape: Strong, durable tape to secure boxes and prevent damage.
- Bubble Wrap & Packing Paper: Cushion fragile items and fill empty spaces to avoid shifting.
- Mattress Bags & Furniture Covers: Keep large items safe from dust, moisture, and scratches.
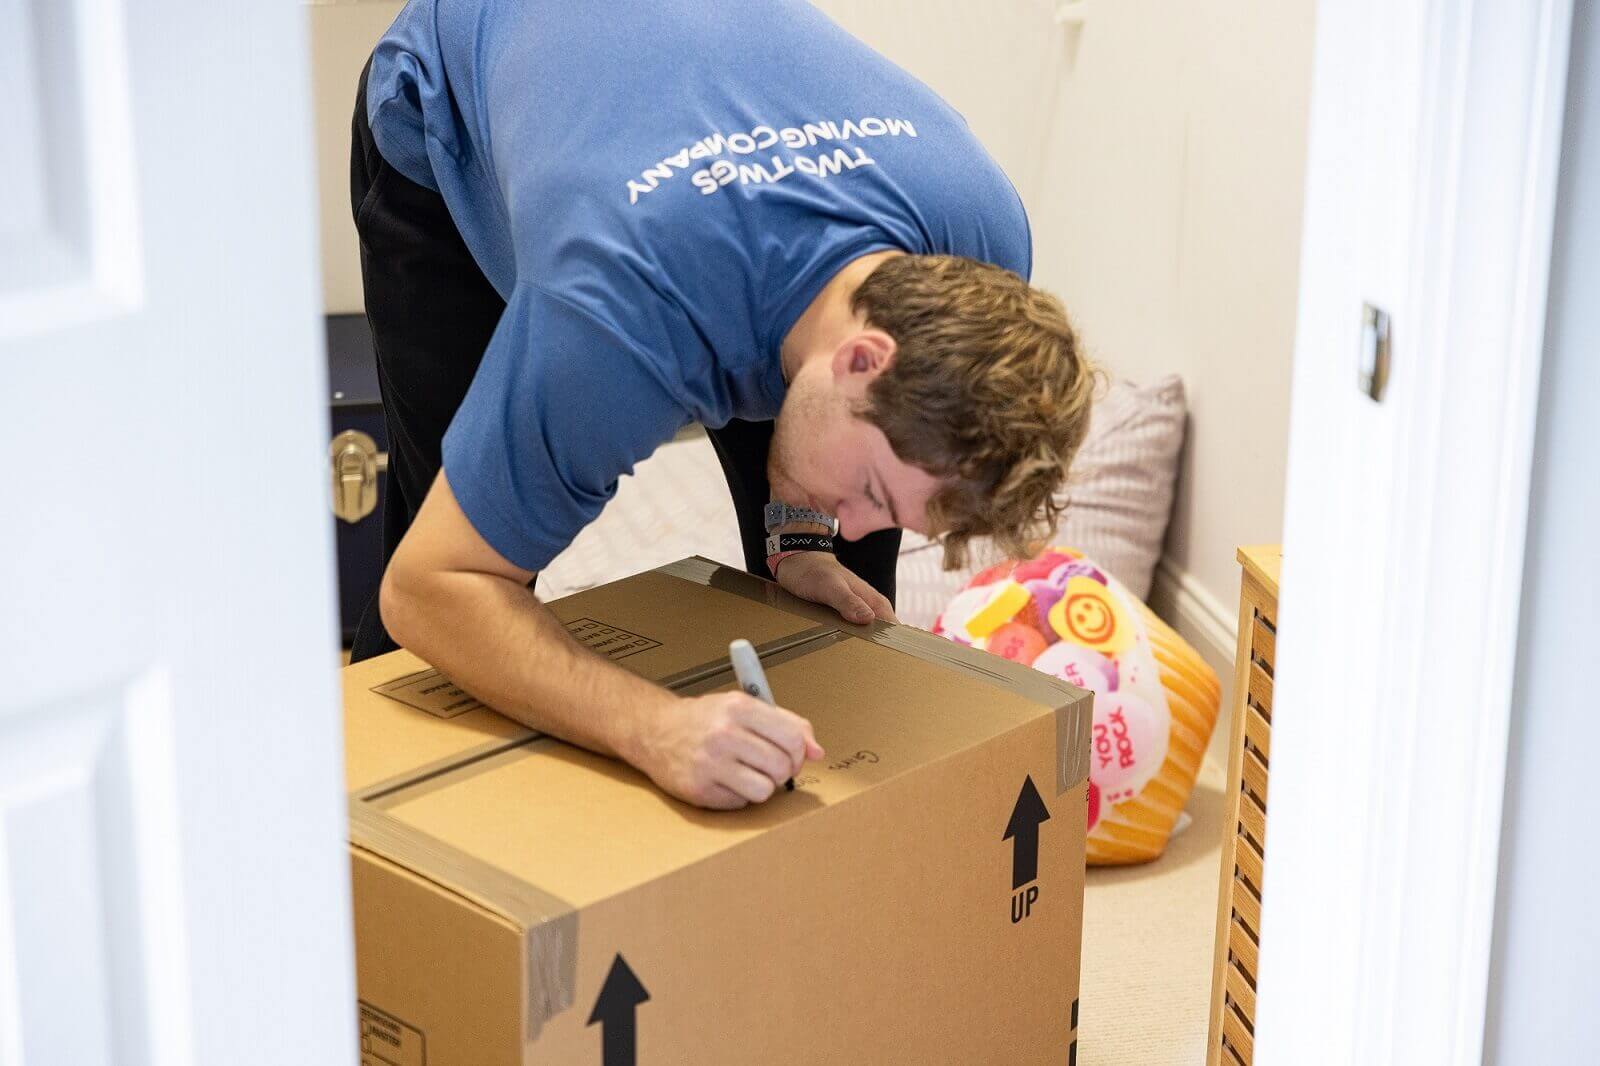
- Labels & Markers: Organize boxes by room and contents for easy unpacking.
- Stretch Wrap: Protect furniture and bundle items without sticky residue.
- Hand Trucks & Dollies: Move heavy items safely and efficiently.
- Plastic Bags & Zip Ties: Keep small items organized and secure hardware to furniture.
Using these tools ensures a smoother, safer move and reduces the risk of damage or loss. Investing in quality supplies upfront can save you time, money, and stress.
1. Moving Boxes
When it comes to relocating, moving boxes are a must-have. These sturdy, lightweight containers are designed to shield your belongings during the journey, ensuring everything arrives in one piece.
Standard Box Sizes
Moving boxes typically come in four main sizes, each suited for specific items:
- Small boxes (16⅜" x 12⅝" x 12⅝"): Ideal for heavier, compact items like books, canned goods, and vinyl records.
- Medium boxes (18⅛" x 18" x 16"): Perfect for everyday items such as toys, lampshades, and bathroom essentials.
- Large boxes (18" x 18" x 24"): Best for lightweight but bulky items like folded clothes or stereo speakers.
- Extra-large boxes (24" x 18" x 24"): Great for larger, softer items like pillows, comforters, and couch cushions.
These standard sizes are versatile, but there are specialty options for unique moving needs.
Specialty Boxes
For items that don’t fit neatly into standard boxes, specialty options come to the rescue:
- Wardrobe boxes: These boxes let you hang clothes during the move, keeping them wrinkle-free. A wardrobe box typically costs about $23.48.
- TV boxes: Designed to protect flat-screen TVs, these can hold screens up to 86 inches. A heavy-duty TV box is priced around $39.98.
Heavy-Duty Boxes
For extra protection, heavy-duty boxes are a smart choice. Their double-wall construction makes them stronger than standard boxes, which is especially useful when stacking or transporting fragile items. While they cost slightly more – around $3.78 for a medium heavy-duty box versus $2.28 for a standard medium box – they’re worth the extra investment.
Packing Tips and Costs
A good packing strategy is just as crucial as choosing the right boxes. For easier lifting and to minimize the risk of injury, pack heavier items in smaller boxes and aim to keep each box under 40 pounds.
Here’s a quick look at typical prices for standard moving boxes:
- Small boxes: Starting at $1.78
- Medium boxes: Around $2.28
- Large boxes: Approximately $2.78
Investing in quality moving supplies can save you from the hassle and expense of replacing damaged items.
2. Packing Tape
Boxes might be the backbone of your move, but packing tape is the glue – literally – that holds everything together. Without reliable tape, even the strongest box can fall apart, putting your belongings at risk during the move.
Types of Packing Tape
Not all packing tape is created equal. Here’s a quick breakdown of the most common options:
- Standard Acrylic Tape: Great for everyday use and lighter boxes.
- Hot Melt Tape: Designed for heavier loads and provides a stronger hold.
- Reinforced Filament Tape: Offers added strength with embedded fibers.
- Water-Activated Tape: Bonds permanently to the box, creating a tamper-evident seal.
Each type serves a specific purpose, so choosing the right one depends on what you’re packing.
Picking the Right Strength
For a secure move, go for tape with high tensile strength and a thickness of at least 2.0 mils. This ensures durability, even during rough handling.
Beyond Just Sealing Boxes
Packing tape isn’t just for sealing boxes. It’s a multitasking tool that can:
- Reinforce box seams for extra durability.
- Bundle items together for easier transport.
- Secure bubble wrap around fragile pieces.
- Patch up small tears or damage on boxes.
Its versatility makes it a must-have for any move.
Applying Tape the Right Way
To keep your boxes secure, apply tape strategically:
- Use three strips of tape: one along the center seam and one on each edge.
- For heavier boxes, try the H-taping method, which covers all seams for maximum reinforcement.
- A tape dispenser can save time and reduce strain on your hands, making the process much smoother.
Cost and Quality
Packing tape typically costs between $2 and $5 per roll, with heavier-duty options on the higher end. While it might seem like a small detail, investing in quality tape can save you from dealing with broken boxes and damaged items later.
| Tape Type | Strength | Best Use Cases | Price Range (per roll) |
|---|---|---|---|
| Standard Clear | Moderate | Light to medium boxes | $2–$3 |
| Heavy-Duty | High | Heavy or fragile item boxes | $3–$5 |
| Specialty (Water-Activated) | Very High | Long-term storage, high-value items | $5+ |
With your boxes sealed and secure, the next step is all about protecting your items with proper wrapping and careful handling during the move.
3. Bubble Wrap and Packing Paper
Once you’ve sealed your boxes securely, the next step is to add a layer of protection with cushioning materials. Bubble wrap and packing paper are key players in shielding your belongings from shocks and vibrations during the move. These materials work hand-in-hand with sturdy boxes, laying the groundwork for effective wrapping techniques.
How Bubble Wrap and Packing Paper Work
Bubble wrap acts as a cushion, thanks to its air-filled pockets that absorb impact. On the other hand, packing paper is incredibly flexible, making it ideal for wrapping items with irregular shapes.
"Packing paper is more flexible than bubble wrap and it’s faster to use." – Lior Rachmany, CEO and founder of Dumbo Moving + Storage
While bubble wrap is perfect for fragile items, packing paper molds easily around odd-shaped objects, offering versatile protection.
Wrapping Techniques That Work
Always wrap items individually. For bubble wrap, ensure the bubbles face inward to maximize cushioning. For hollow objects, fill the interior with crumpled packing paper to prevent breakage.
Layering for Maximum Safety
Start by lining the bottom of your boxes with soft materials like bubble wrap or crumpled packing paper. Add extra padding around the items using fillers such as packing peanuts or more crumpled paper to minimize movement during transit.
Choosing the Right Box and Packing Strategically
A sturdy, well-sized box is just as important as the cushioning inside. Use smaller boxes for heavy or fragile items, and always place heavier items at the bottom to balance the load. For delicate items, dividers can add an extra layer of safety. Don’t forget to label boxes containing breakables as "FRAGILE".
4. Mattress Bags and Furniture Covers
When it comes to moving, protecting your larger items is just as important as safeguarding fragile ones. Take your mattress, for instance – it’s a major investment, often costing anywhere between $500 and $10,000. Without the right protection, it can easily fall victim to dust, moisture, or even rough handling during the move. That’s where mattress bags and furniture covers come in, acting as a protective barrier to keep your biggest belongings in top condition.
Just like sturdy boxes and strong tape secure your smaller items, these covers ensure your larger possessions make it through the move unscathed.
The Role of Material Thickness
The strength of a mattress bag depends heavily on its thickness. While the standard option is 1.5 mils, more durable choices can go up to 3.0 mils. These heavy-duty plastic covers are built to withstand the challenges of moving day without tearing or puncturing, offering an extra layer of security.
More Than Just Moving Protection
Mattress bags don’t just help during the move – they’re also great for shielding your mattress from long-term threats like dirt, moisture, and pests. Whether you’re storing it temporarily or for an extended period, these covers provide peace of mind.
Affordable Options for Every Budget
Protecting your mattress doesn’t mean spending a fortune. For example, the DiRose Queen size mattress storage bag is priced at $9.99 and boasts a 4.3/5 rating on Amazon based on 650 customer reviews. While many users praise its balance of affordability and functionality, some note that cheaper alternatives may be prone to tearing or might not fit properly.
Easy-to-Follow Application Tips
Before bagging your mattress, make sure it’s clean and completely dry. Opt for a bag that fits snugly to minimize shifting during transport. Once the mattress is inside, seal the bag with packing tape to create an airtight barrier that keeps out dirt, moisture, and pests.
For furniture, the process is similar. Clean each piece thoroughly before covering it to prevent scratches caused by trapped dust or debris. When possible, disassemble furniture to make it easier to move and reduce the risk of damage. Furniture covers can protect items during all kinds of moves, whether it’s a residential move or apartment relocation.
If you’re storing a mattress for an extended period, always lay it flat on an even surface. This helps maintain its shape and prevents warping, which can impact your sleep quality down the line.
5. Labels and Markers
When it comes to moving, proper labeling can save you hours of frustration. Without clear labels, you’ll end up wasting time rummaging through boxes to find what you need. Fortunately, all it takes is a few quality markers and a bit of planning to create an efficient system.
Durable Markers Make a Difference
Invest in permanent markers with thick tips – they’re less likely to smudge or fade over time. For an extra touch of organization, consider using colored markers. Assign a different color to each room, making it easier to identify where everything belongs at a glance.
Simple Organization Systems That Work
An effective labeling system strikes a balance between clarity and speed. Write the contents and destination room on each box in large, legible text. Be specific – labels like "kitchen – pots, pans, utensils" are much more helpful than vague ones like "kitchen stuff".
Want to take it a step further? Try color-coding. Use colored tape or markers consistently for each room. For example, blue might represent the bathroom, while green signifies the living room. This visual shortcut can make unpacking much faster.
If you prefer a more detailed approach, the "number and list" method is a game-changer. Assign each box a unique number and create a master list detailing its contents. For instance, Box #15 might hold winter coats and scarves, while Box #16 contains photo albums and letters. This method is especially handy for long-distance moves, where keeping track of belongings is even more critical.
Cost-Effective Labeling Solutions
While pre-made labels can save time, you don’t need to spend extra money. Colored tape and markers are just as effective. A single pack of colored tape is usually enough to organize an entire household. If you don’t have colored tape, masking tape works too – just write the room name or contents directly on it.
You can also prioritize your labeling by focusing on the essentials. Create a "Priority 1" system for boxes containing items you’ll need right away, like toiletries, medications, or a change of clothes. This ensures that your most important items are easy to find during the chaos of moving day.
Smart Labeling Techniques
Visibility is key. Label at least two, if not three, sides of every box. This way, you can easily identify what’s inside, even when boxes are stacked.
For an added layer of organization, consider snapping photos of each box’s contents before sealing it. This digital inventory makes it simple to scroll through your phone to locate specific items. Whether you’re managing a residential move or an office move, this modern trick can save you a lot of hassle.
Focus your detailed labeling efforts on high-priority items like first-night essentials, important documents, and electronics. And remember, your labeling system should be easy for everyone to follow. Whether you’re working with professional movers or friends, the goal is to make sure anyone can quickly figure out where each box belongs in your new home.
sbb-itb-a5538b6
6. Stretch Wrap
Stretch wrap is a must-have when it comes to protecting your belongings during a move. This flexible plastic film forms a secure barrier around your items, keeping them bundled together without leaving behind any sticky residue. Unlike packing tape, which can damage surfaces, stretch wrap clings only to itself, making it perfect for safeguarding wood furniture and other delicate finishes.
Why Stretch Wrap Works So Well
One of the standout features of stretch wrap is its elasticity. When applied correctly, it acts like a giant rubber band, holding your items tightly in place. This secure grip helps prevent furniture from shifting during transit, minimizing the chances of scratches or damage.
Stretch wrap is also a budget-friendly option. It costs less than shrink wrap or multiple straps and is made from fully recyclable materials, making it a practical and eco-conscious choice .
Smart Ways to Use Stretch Wrap
Stretch wrap is incredibly versatile. Use it to shield furniture from scratches, keep dresser drawers from sliding open, or bundle loose items together. If you’re moving from an apartment, it’s especially handy for securing cabinet doors and keeping small appliances compact.
For a long-distance move, the extra protection stretch wrap offers is invaluable, ensuring your items arrive in great condition.
Tips for Wrapping Like a Pro
To get the best results, start wrapping at the bottom of your item and work your way up, overlapping each layer by about 50%. Stretch wrap can extend 150%–300% of its original length, so pull it tight as you go. For valuable items, consider using opaque stretch wrap – it provides an added layer of privacy and helps deter theft. This can be especially useful if you’re storing items temporarily or working with a local moving company.
Maximizing Your Stretch Wrap
A single roll of stretch wrap can cover a lot of ground. Focus on high-priority items like upholstered furniture, electronics, and anything with moving parts. You don’t need to wrap everything – save it for items that truly need the extra protection. Unlike shrink wrap, stretch wrap doesn’t require heat to apply, making it safer and easier to use.
Whether you’re planning a residential move or coordinating an office move, stretch wrap provides the flexibility and protection you need to make moving day smoother and less stressful.
Up next, learn how hand trucks and dollies can make your move even easier.
7. Hand Trucks and Dollies
Moving heavy items like refrigerators, washing machines, or large boxes can be challenging without the right tools. Hand trucks and dollies are game-changers, making it easier and safer to transport heavy loads by evenly distributing the weight.
Choosing the Right Equipment
Hand trucks, often called two-wheelers, are perfect for stacked boxes and tall appliances. Their upright, two-wheeled design allows you to tilt and roll items with ease. On the other hand, dollies are flat with four wheels, offering better stability for bulky furniture and wider appliances. For particularly heavy equipment, appliance dollies come with added features like straps for extra security, making them ideal for demanding tasks like residential moving. Understanding the differences between these tools can help you make the best choice based on your needs and budget.
Should You Rent or Buy?
The decision to rent or buy depends on how often you’ll need the equipment. If you’re tackling a one-time move, renting is usually the most cost-effective option. However, if you frequently help friends move or take on home improvement projects, buying your own tools can save money over time.
Here’s a quick look at costs:
| Equipment Type | Daily Rental Cost | Purchase Price |
|---|---|---|
| Hand Truck | $10 – $30 | $50 – $200 |
| Standard Dolly | $15 – $35 | $70 – $230 |
| Furniture Dolly | $7 – $20 | Not specified |
| Appliance Dolly | ~$10 | ~$155 |
For a single apartment move, renting makes sense financially. But if you’re constantly moving heavy items, owning your equipment might be a smarter investment. Renting eliminates storage concerns and upfront costs, while buying offers convenience and long-term savings for frequent use.
Safety Tips for Using Hand Trucks and Dollies
Proper technique is key to avoiding injuries and keeping your equipment in good shape. Always assess the weight of the item before lifting, keep your back straight, and use your legs to do the heavy work when tilting a hand truck. When using a dolly, center the load and secure it tightly, especially if you’re navigating stairs or uneven surfaces.
Even if you hire a local moving company, having your own equipment can be useful for organizing before the movers arrive or handling items you’d prefer to move yourself.
Whether you’re planning an office relocation or a household move, the right tools can make the process safer and more efficient. Weigh your needs, budget, and how often you’ll use the equipment when deciding between renting and buying.
8. Plastic Bags and Zip Ties
Plastic bags and zip ties might not be the first things that come to mind when planning a move, but they can make a world of difference in keeping things organized and preventing items from getting lost. After discussing the importance of hand trucks and dollies, these smaller tools offer another layer of efficiency to the moving process.
Picking the Right Plastic Bags
Opt for heavy-duty, clear plastic bags in various sizes. Bags with zippers or handles are especially useful because they make packing easier while protecting your belongings during transit. For certain items, these bags can even replace traditional moving boxes. Plus, their stackable nature helps save space when loading up your moving truck.
Tips for Staying Organized
- Use labeled bags to store small accessories like remote controls, charging cables, and other easily misplaced items.
- Group similar items together in labeled bags before packing them in boxes – this makes unpacking much easier.
- For personal care products, tightly seal bottles and place them in resealable plastic bags to prevent messy spills.
- If you’re tackling an office move, keep things like pens, paper clips, and desk accessories in smaller bags before placing them into larger containers.
Why Zip Ties Are a Game-Changer
Zip ties are perfect for bundling items together, especially cables, to reduce clutter during the move. They also come in handy for furniture hardware – store screws, bolts, and assembly instructions in a small bag, then secure that bag to the furniture piece using a zip tie. This simple step ensures nothing gets misplaced during disassembly and reassembly.
Whether you’re handling a residential move or working with a local moving company, these tools can help streamline the process. Plastic bags and zip ties may seem small, but they pack a big punch when it comes to staying organized and making your move as smooth as possible. Together, they’re a crucial part of your moving toolkit.
Conclusion
Having the right moving supplies can make the difference between a chaotic move and a smooth, stress-free transition. Proper preparation protects your belongings and prevents unnecessary expenses along the way.
The Cost of Cutting Corners
Skimping on packing materials can backfire in a big way. In fact, over 80% of moving damage claims are linked to poor packing practices. Cheap supplies not only increase the risk of damaged items but can also lead to injuries and added stress during an already challenging time.
Why Professional Movers Are Worth It
Hiring professional movers can cut the risk of damage by up to 50%. They bring high-quality materials, along with the expertise to handle your belongings with care. Whether you’re tackling a residential move, apartment move, or office move, experienced movers can recommend the best materials and strategies for your unique situation.
The Smart Choice for Your Move
Investing in durable supplies and professional assistance can actually save you money in the long run. These choices not only prevent costly damage but also help streamline the entire moving process, reducing the time and effort required. The combination of the right tools and expert handling ensures your move is as hassle-free as possible.
Need Help Getting Started?
Feeling overwhelmed? Reach out to local moving companies for a free consultation. Many movers offer free quotes and supply packages tailored to your needs, giving you expert advice and peace of mind for a smoother, more successful move.
FAQs
Why should I use specialty boxes like wardrobe or TV boxes when moving?
Using specialty boxes such as wardrobe and TV boxes can simplify your move while keeping your belongings safe. Wardrobe boxes are perfect for transporting clothes on hangers, ensuring they stay wrinkle-free and clean. Plus, they save you time by eliminating the need to fold and unpack later. Meanwhile, TV boxes are tailored for flat-screen televisions, offering extra padding to protect against scratches or other damage during the trip. These boxes are a practical choice to safeguard your valuables and streamline the moving process.
Should I rent or buy moving equipment like hand trucks and dollies?
Deciding whether to rent or buy moving equipment comes down to two key factors: how often you move and your budget. If moving is a rare event for you, renting is usually the way to go. Daily rental rates typically range from $15 to $50, making it a cost-effective option. Plus, you won’t have to worry about finding storage space or dealing with maintenance.
However, if you move frequently or foresee using the equipment for multiple projects, buying might make more sense. Take an appliance dolly, for instance – it costs about $150 to purchase new and can quickly pay for itself after just a few uses. Think about your long-term needs and compare the costs to figure out what works best for your situation.
What are the best ways to label boxes for an easy unpacking process in your new home?
To simplify unpacking, start by labeling each box clearly with its contents and the room it’s meant for. Using color-coded labels or stickers for different rooms can make it even easier to identify where everything goes at a glance. If you want to stay extra organized, consider creating a simple inventory list to track all your belongings.
For fragile items, don’t forget to mark them with a bold "Fragile" label to ensure they’re handled with care. You can also prioritize unpacking by marking boxes with essential items you’ll need immediately. These straightforward labeling tips can save you time, cut down on stress, and make settling into your new home a breeze.
.svg)


